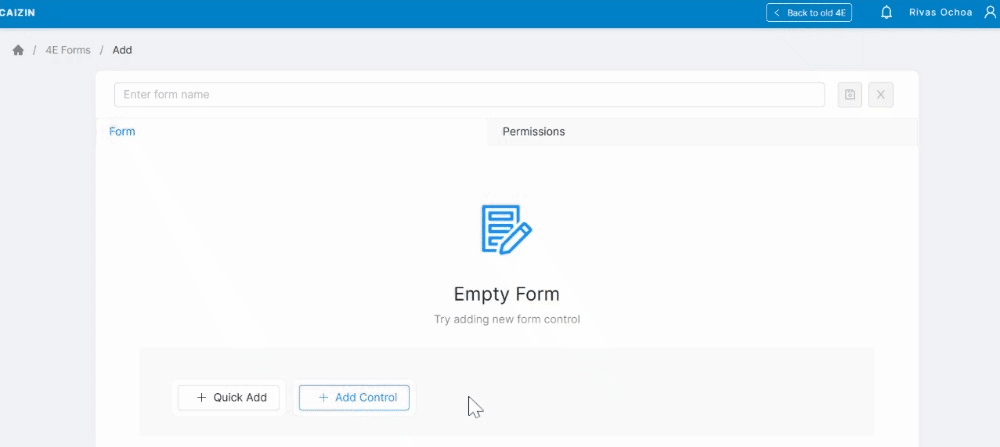
Add Form
To calculate the actuals of the KPIs, users must capture the associated data in the most basic and raw format. 4E forms are used to fetch these datasets into the 4E application. There are multiple ways of capturing the data into 4E forms. Users can simply copy and paste the data from an existing worksheet, manually punch the data into the forms, upload data in CSV format or connect it to external sources like SAP terminals.
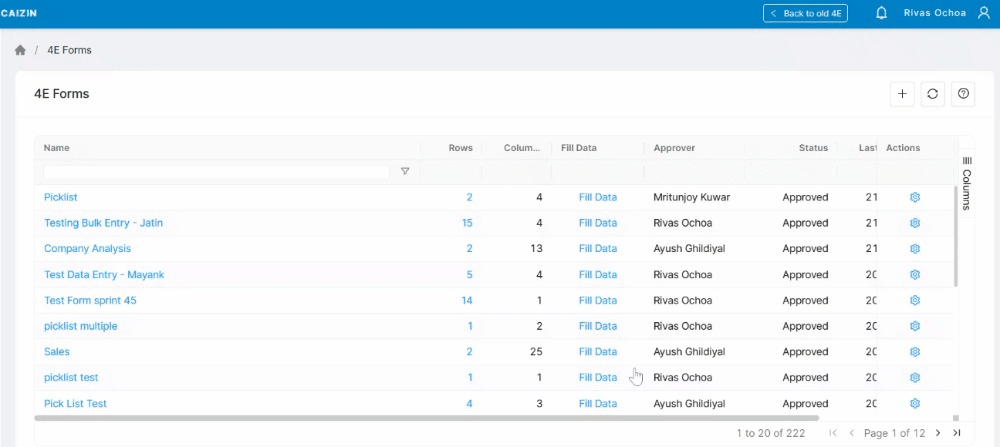
The form is like any online form that you may have seen, users can customize forms as per their need and capture the required data manually, through CSVs or manual bulk upload. Users can create and design a Form by clicking on the 'Add Form +' button on the Form Listing page.
Various Form Elements are available to design the form such as Text Field, Dropdown, Checkbox etc.
Add Form
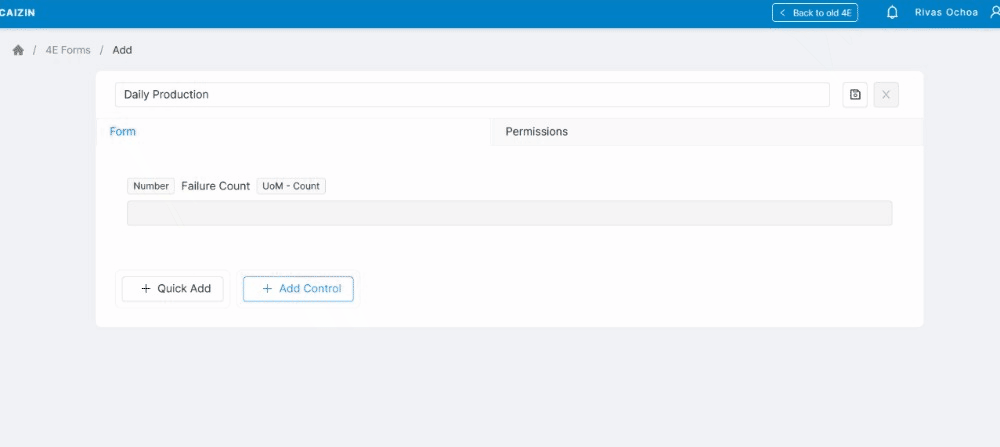
Form creation is a three-step process
Enter form Name
Add Form Fields
Click and add the required form field to the form
Click on the added form field
Capture all Required information for this field
Add Permissions
Permissions can be given to individual users, and/or selected Departments and/or selected Groups.
To fetch the data from a form, the KPI owner needs to have the 'Read' permission.
Users having ‘Fill the Form’ permission can enter/edit/delete the data in the form.
‘Edit’ permission gives the privilege to add/edit form fields in the form. The updates in the form must be approved by the Approver
Only one Employee can be the Approver. Any changes to the form structure are sent for approval to the approver.
By default, the creator of the form will have all the permission of the form. Also, the supervisor of the creator (except for the root user) will have the read permission.
Users can search and add more employees/departments/groups to the permissions list
Permission matrix
Access | Read Data | Fill Form | Bulk Entry | Import CSV | Delete/Bulk Data | Edit Form | Delete form |
|---|---|---|---|---|---|---|---|
Fill the form | Yes | Yes | Yes | Yes | Yes | No | No |
Read | Yes | No | No | No | No | No | No |
Edit | Yes | No | No | No | Yes | Yes | Yes |
Form Fields
The properties of the form field vary as per the selected field. For example, for Dropdown and Radio, users can add option values. For Text Field default value and Text Limit can be set. For the Dynamic Picklist field, users can either provide a fixed set of values or pick the list from the available Master Data.
The Number field alone can be used as a metric under the Data Source section of KPI Definition only when 'Use this field as metric' is selected while designing the form.
Thus, users can enter any form element on the form but ONLY the number field chosen also chosen as a metric would appear for selection for Data Source actuals of KPI.
Below is the Permission and corresponding access matrix
Form Element | Description |
|---|---|
Text field | This field element is used to enter simple text. Users can set any default value and set the limit on the number of characters while designing the form. |
Paragraph | On the form the user can define a paragraph to provide any information about the form. This is a static field. Text of the paragraph must be defined while designing the form. |
Heading | Like paragraph this is also a static field. User can define a heading for the form while designing the form. |
Dropdown | Users can add values for the dropdown field which can be selected while filling the form. |
Checkbox dropdown | This element lets the user define values which will appear as checkbox in the dropdown. Users can select multiple values in the dropdown. |
Checkbox | This is a single checkbox which can be checked or unchecked in the form. |
Date | Users can select a date in this field. |
Time | Users can select/enter time in this field. |
Number | Number field is where user can enter any numeric value. If user selects the option of selecting the field as metric, then it can be set to be used as a data source for a KPI and in the computations in any computed metric. UoM must be selected when it is used as a metric. |
Email field can be added on the form to enter any email address. | |
Radio | Values added under Radio element are shown as radio buttons on the form, and a single value can be selected out of those options. |
File upload | The file Upload element opens File browser dialog to select a file. The file is uploaded against the record of the form. |
Section break | This is shown as a line to separate the sections on the form. |
Dynamic pick list | Dynamic picklist can be designed to have fixed values or dynamic values from the master data. When the user selects Fixed, then the user has the options to select one of the lists from Employees, Departments, Locations, Financial Year. These values are already defined under the Settings section. When user selects Populate from Master Data then user has option to select any of the predefined Master Data list that can be found in Settings section and can be created from Internal or SAP forms. |
Please note: For every form created, the first default column will be the ‘Sample date and time’. The expected input in this column is the actual date and time when the raw data was obtained/collected, and this input is used to aggregate the raw data over a period as defined in the KPIs definition and then calculate the KPIs’ actuals.
LAST_UPDATED | 9 Aug 2022, Mritunjoy 15 Dec 2023, Mritunjoy Kuwar |
|---|